A silver gelatin dry plate glass negative in landscape format.

Country Always

Caring for Country

A Corner of the Empire

The Garden Palace

Sepia photograph of the Technological Museum and a cow in the foreground

The Holding Pen

The Agricultural Hall

Sepia photograph of the Technological College and Museum in Broken Hill

Regional Networks

Across New South Wales

A Museum of Doing

Technological Museum

Colour photograph of red corrugated iron building from a high vantage point

Transforming the Tramsheds

Powerhouse Stage 1 and the Harwood Building

A Symbol in Time

Sydney Observatory

Powerhouse Museum, Stage 2 exterior from high angle, city skyline in background

Ongoing Transformations

Powerhouse Ultimo

Blurred image from film with museum object number

Applied Arts and Sciences

Defining the terms in the 21st century

Powerhouse Renewal

Artist Xin Liu floating with arm outstretched against a black background. She wears a full-length grey body suit with long sleeves with bare feet and hands.

Sydney Science Festival

Across Sydney10—17 Aug
Shadows cast by the Powerhouse Parramatta exoskeleton on concrete

Exoskeleton

Powerhouse Parramatta

A woman stands on stage in front of a large audience. She has her left hand raised in the air and a microphone in her right hand. The audience are holding their phones up recording the woman.

Blak Powerhouse

Powerhouse x We Are Warriors

Slider thumb2024

Challenge 3

Engineer a solution to the design of the Exolab

Due 29 March 2024

Modify the design of the Exolab to:

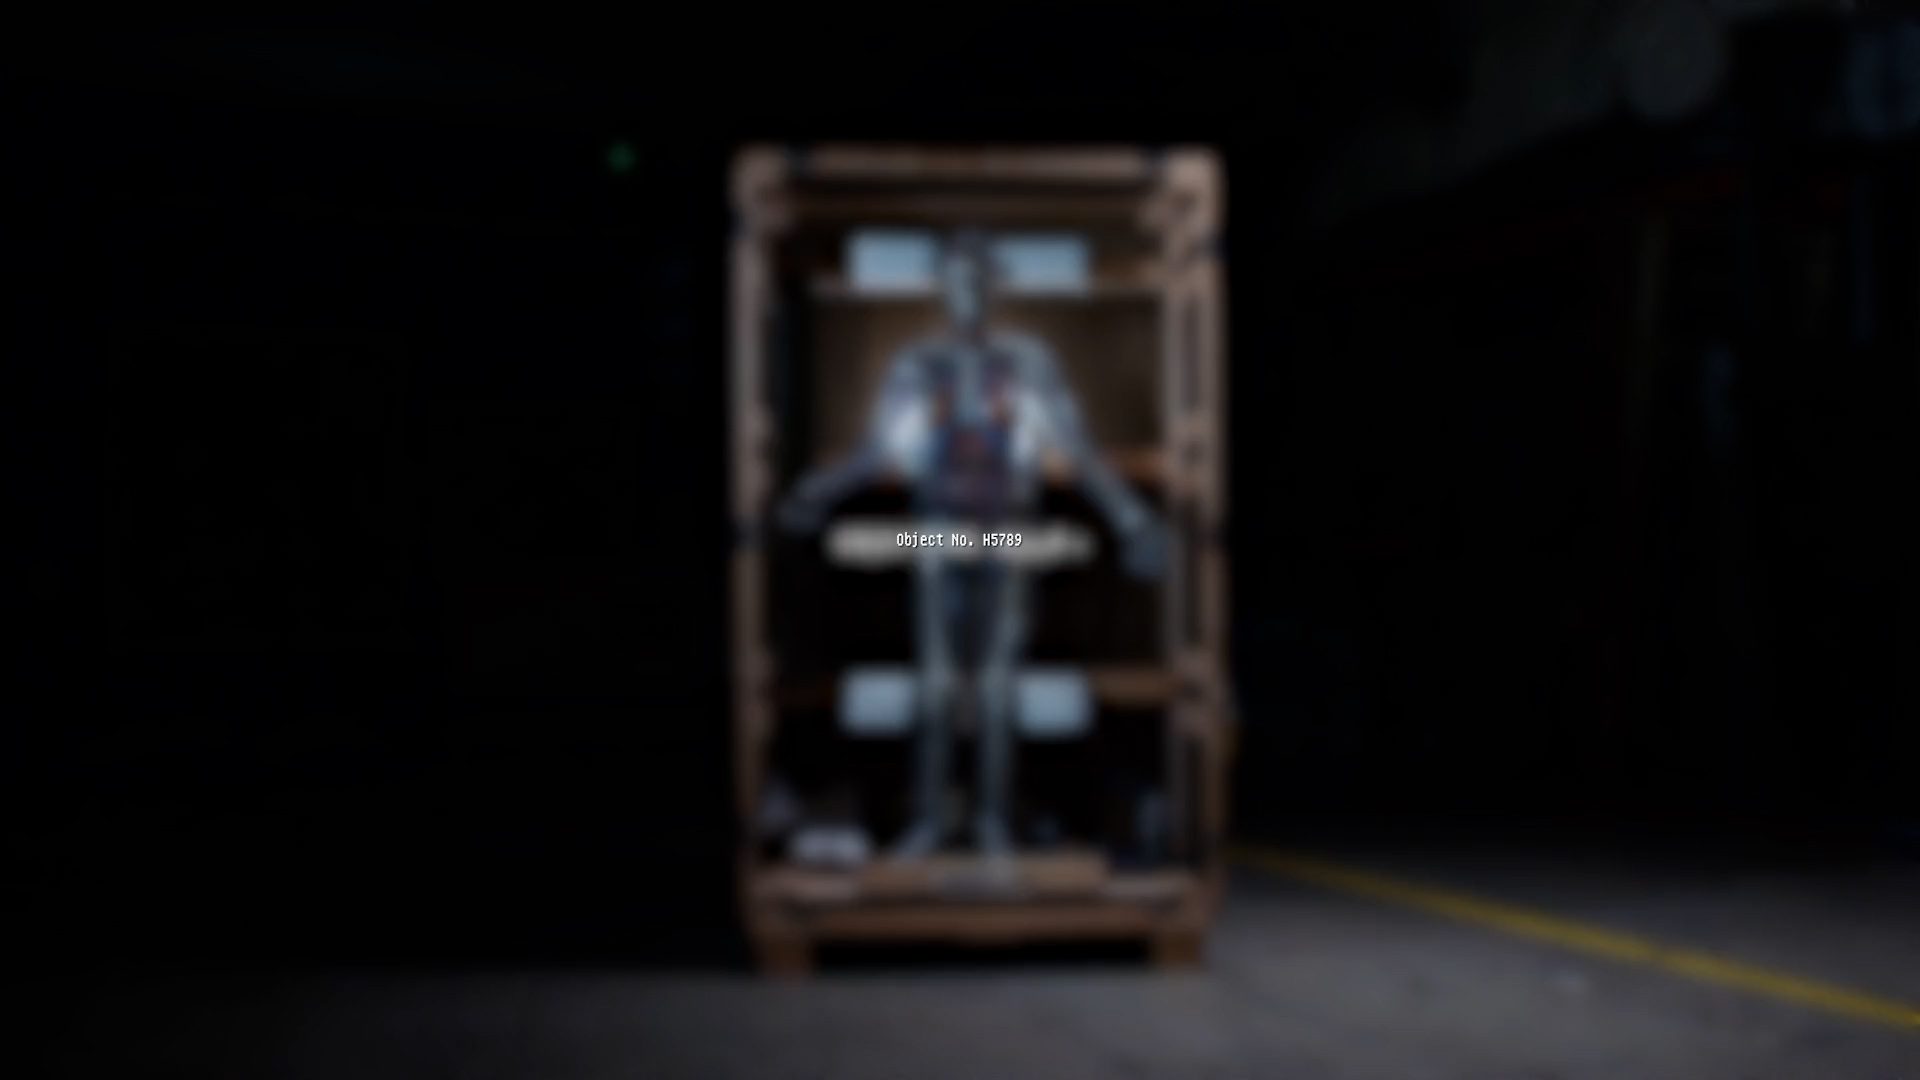
At the end of 2023 schools reconfigured their ExoLabs to measure changes in the algae over time (temperature, humidity, CO2 and lux). Both quantitative data, recorded in spreadsheets, and qualitative data, captured through images from the camera, were collected. It has been discovered that many of the direct visual observations are not aligned with the experiment configuration.

PART 1
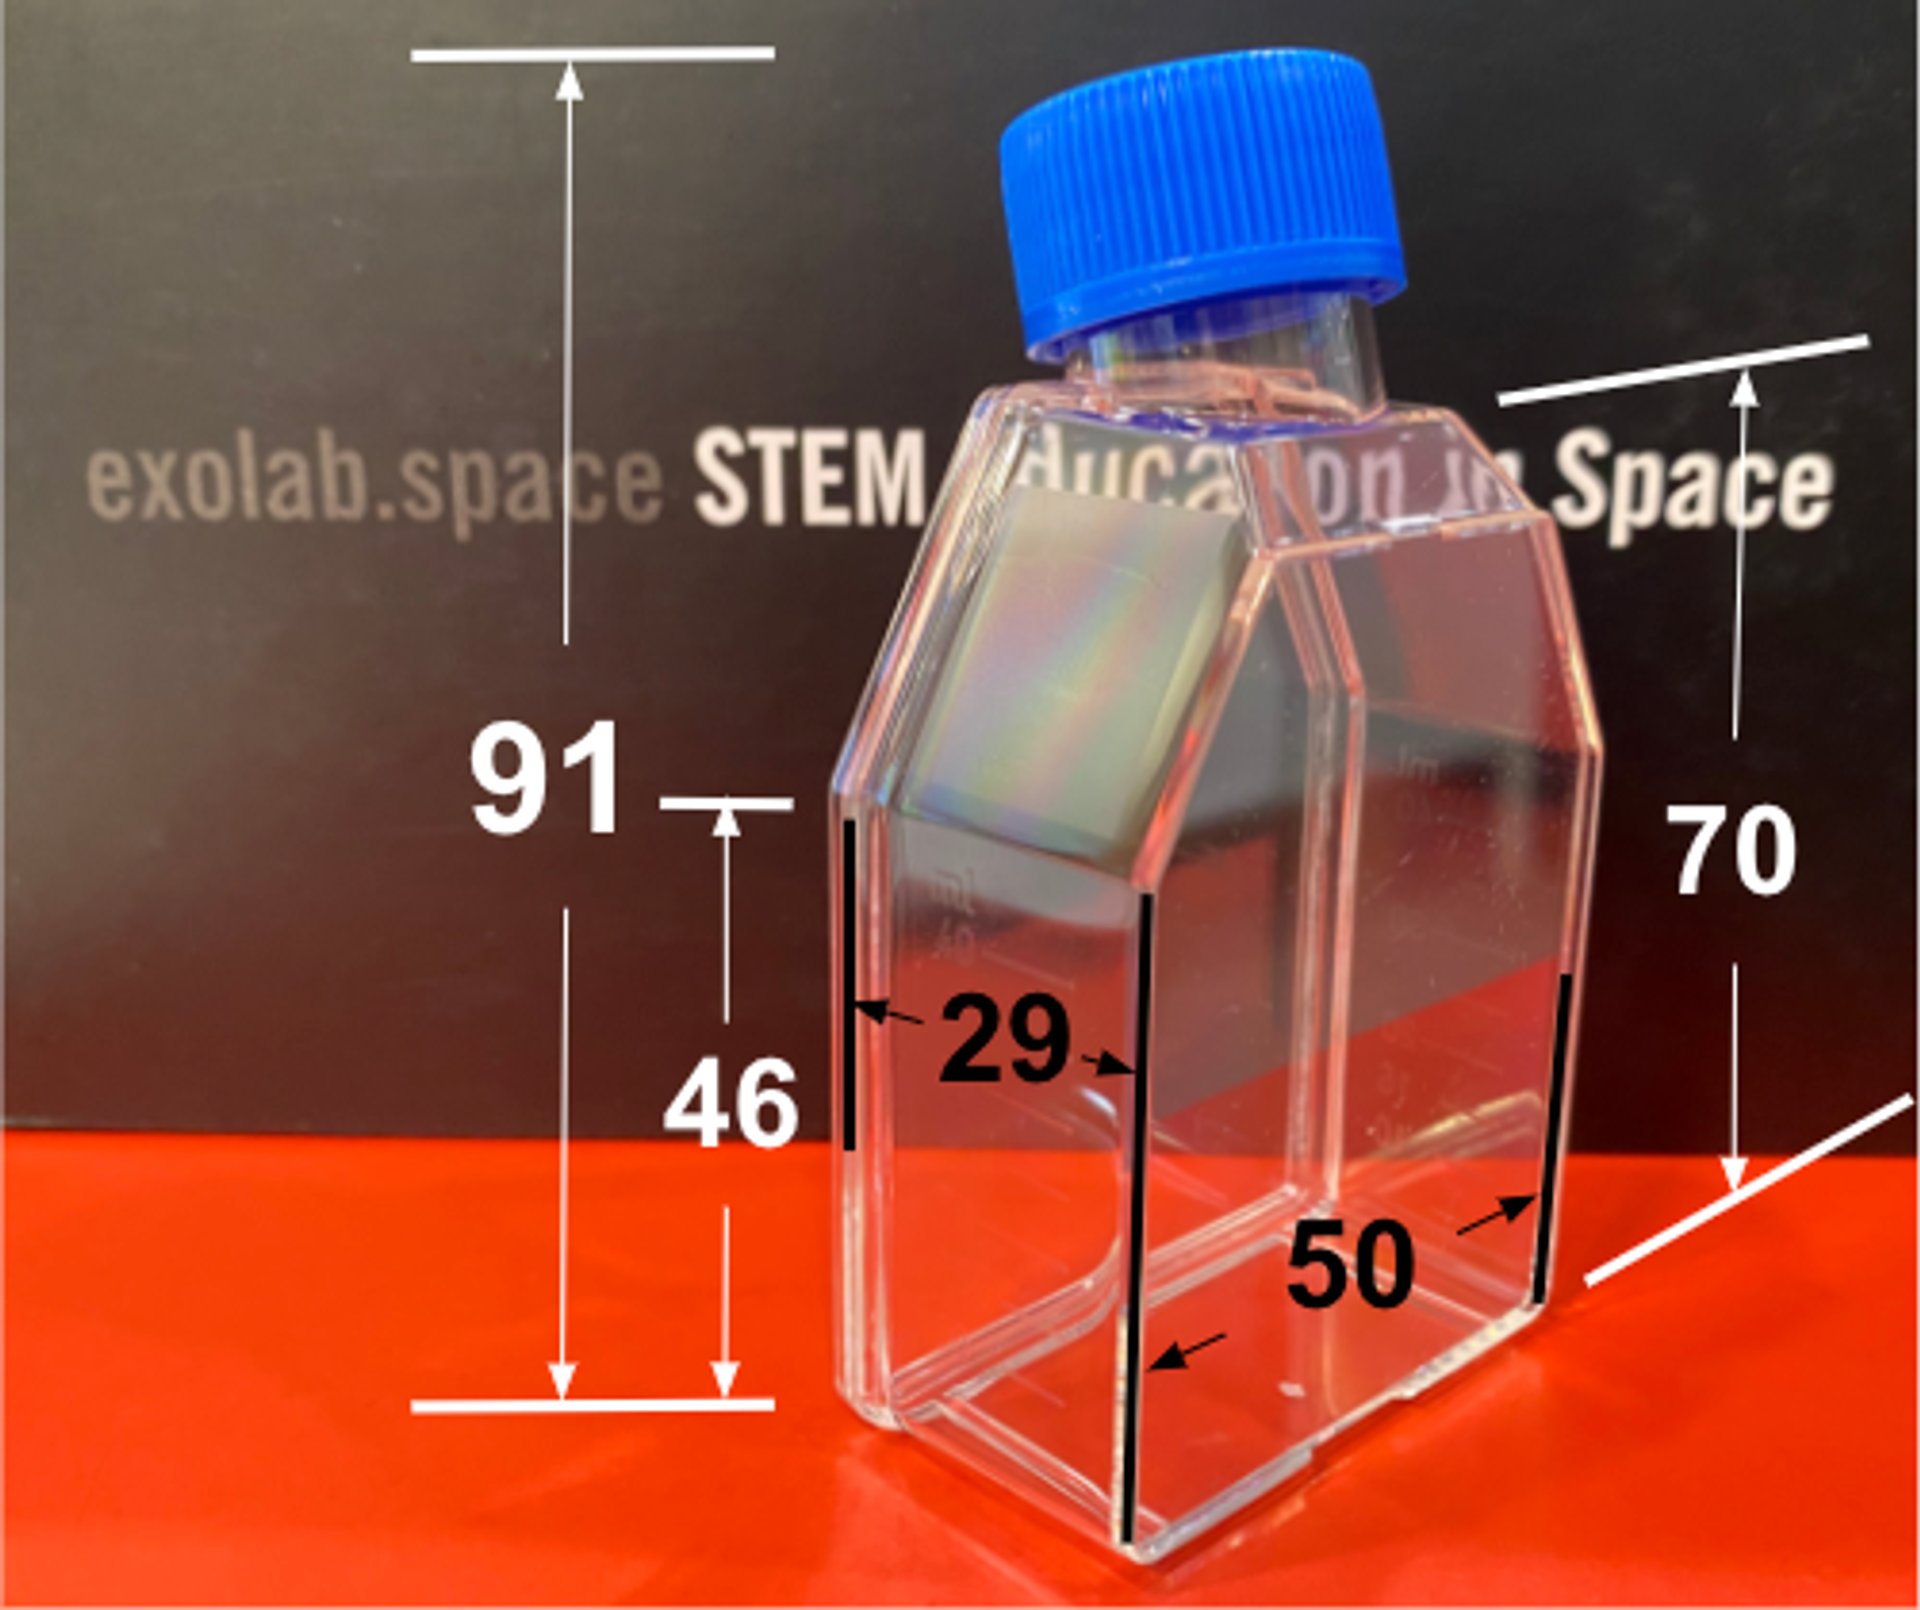
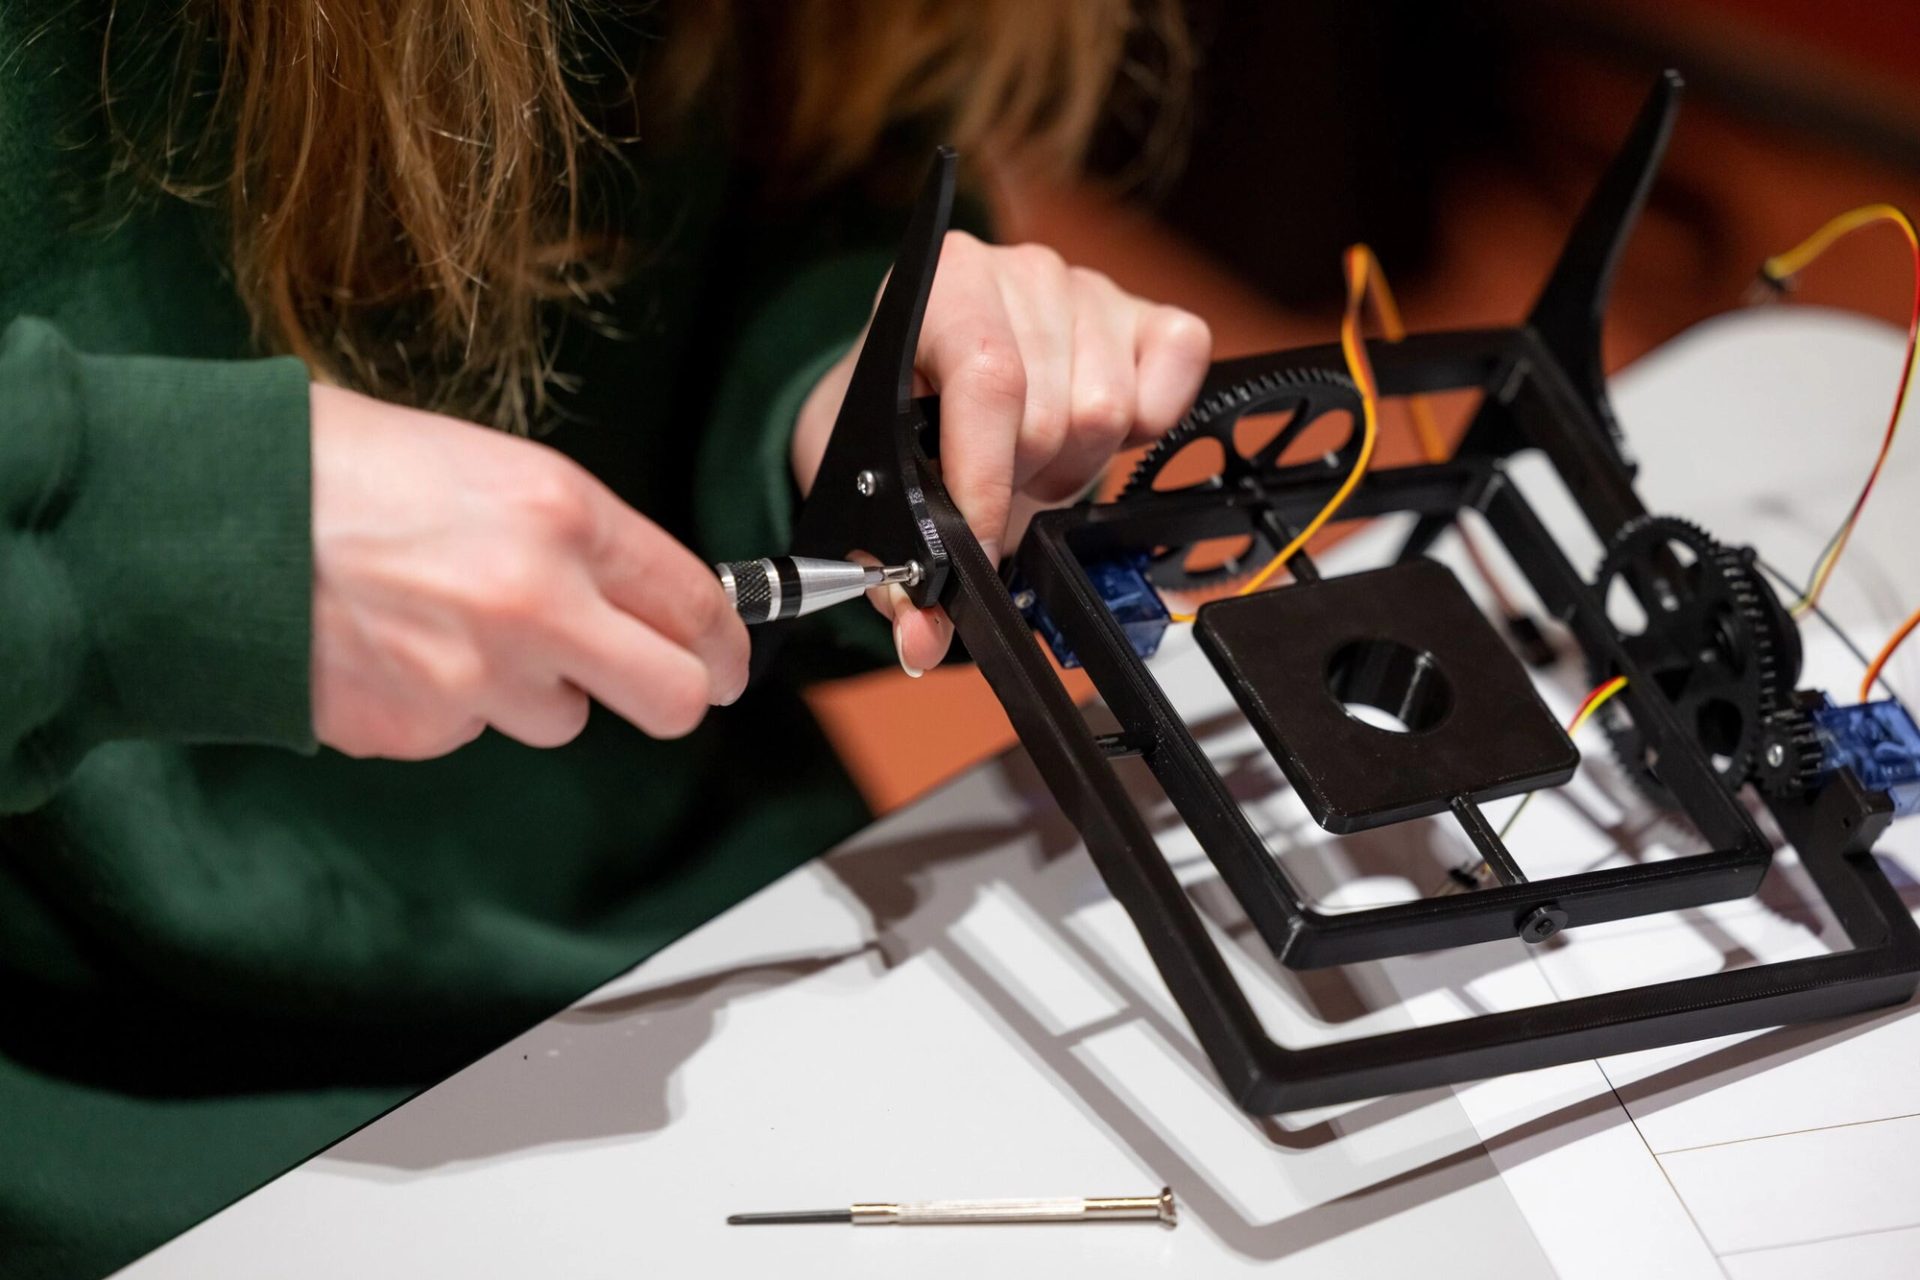
Capture the most accurate visual observations from the camera and design a custom rack to hold the Biologix 25cm² cell culture flask securely in position.

PART 2
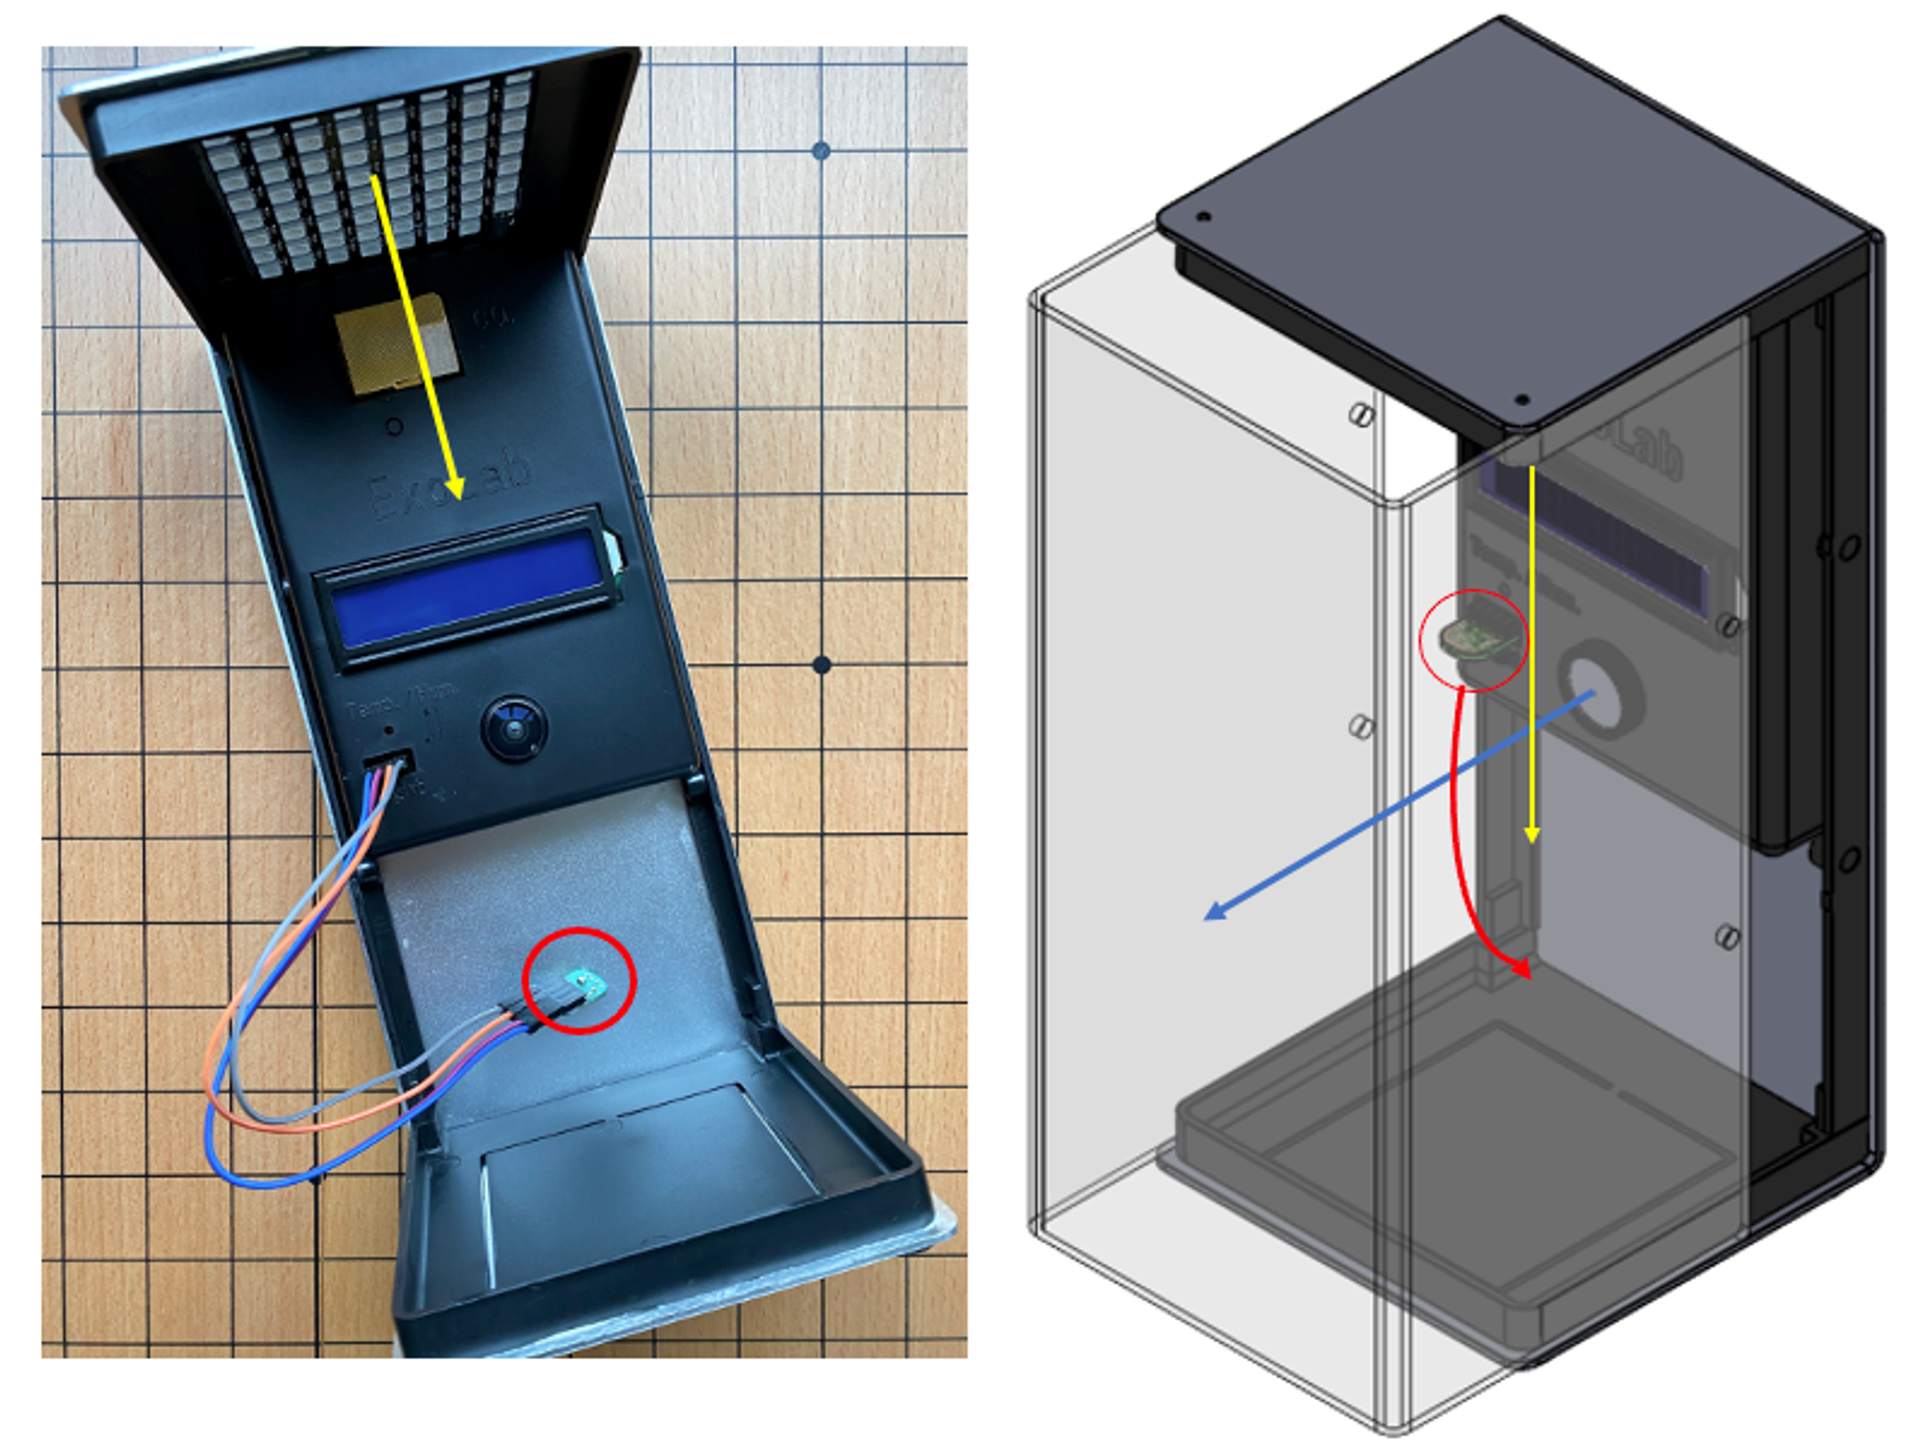
Position the lux sensor so it can measure how much light passes through the flask.

Resources

What is an Exolab?
Access Exolab data on temperature, humidity, CO2, and lux, along with hourly images from 2023 Ground Trials. Some of the images might not be clear as the camera was not aligned with experiment configurations. Log into the online classroom to access data on temperature, humidity, CO2, and lux, along with hourly images from 2023’s Ground Trials.

Part 1

Design and build a custom rack to carry a Biologix 25cm² cell culture flask that fits securely inside the Exolab and is positioned to capture the best images from the in-built camera.

CRITERIA

  • The flask/s will need to be aligned so the algae growth can be viewed from the existing camera.
  • The flasks will need to be held securely in place inside the Exolab. Consider the current design of the Exolab test tube holders.

CONSIDER

  • What is the best way to orient the flask in the Exolab?
  • Should we use more than 1 flask in our experiment?

SUBMISSION FORMAT

Your new design can be developed using CAD drawings, photographs of physical prototype and engineered with found materials, cardboard, or use CAD to design and 3D print or laser cut a solution.

You will need to include a scientific explanation (250 words) about why the design suits the criteria.

IMPORTANT INFORMATION

Biologix Flask
Biologix 25cm² cell culture flask/vial with filter cap, looks like this.

  • Made of high quality medical grade polystyrene
  • Filter caps prevent cross-contamination with gas exchange
  • Short, wide, angled neck design for easy access
  • Gamma radiation sterilized
  • Non-pyrogenic, non-cytotoxic
  • DNase & RNase free, human DNA free

Part 2

Relocate the lux sensor to be in line with the LED array.

AIM
To move the lux sensor in order to measure the optical density of the algae in the water medium as the light from the LED passes through the flask.

BACKGROUND
The ExoLab’s original design needs to be modified to reflect the goals of our research. We need to find ways to quantify the growth of the algae over time. One way to do this is to measure how much light passes through the flask. As the algae multiplies, the amount of light that makes it to the lux sensor from the LEDs will go down. In a way, we are looking at measuring the turbidity of the liquid due to algae growth.

What is a lux sensor?
Lux is a unit of illumination in the International System of Units (SI). One lux (Latin for “light”) is the amount of illumination provided when one lumen is evenly distributed over an area of one square metre. Your ExoLab displays a number in μmol/m2.

The lux sensor is a light-to-digital converter that transforms light intensity to a digital signal output. As the algae grows it will begin to obscure the light from the LEDs and the μmol per square metre will go down.

The lux sensor will need to be moved to be in line with the LED array in order to measure the optical density of the algae in the water medium. Moving the LUX sensor is as simple as adding Male to Female jumper wires. It is important that the pins are properly connected in order and done when the ExoLab is unpowered.

EQUIPMENT
You will need (4) Male to Female jumper cables 20 cm in length for each ExoLab.

RISK ASSESSMENT
ExoLab must be unplugged or the unit will not function or may be damaged. The connectors between the ExoLab and the lux sensor are powered at 3.3-5v.

With your ExoLabunpowered remove the lux sensor by pulling gently (red circle in illustration). You will notice there are 4 pins that the lux sensor connects to. We will add the 4 male to female jumper wires to extend the lux sensor in order to better position it beneath the vial and stand that you have designed.

These wires must be put in the exact order. Ideally use different colour wires to ensure they stay in order.

You will have to plan where you would like to place the sensor - perhaps you may try a few locations and test for an ideal location by gathering data and measuring results.

Once the lux sensor is reconnected to the ExoLab using these extended wires, restart your ExoLab. Everything should be identical but now you can relocate the lux sensor based on your designs. A simple test when your ExoLab is running is to cover the lux sensor or filter it from a light source. You will see your lux levels change either on the LCD screen on the ExoLab, or delayed as part of a time series of data displayed on the website. When you run extended tests you can download the data from the website for analysis as you would any ExoLab mission.

When finally mounting the lux sensor, make sure that the sensor is facing toward the LEDs, and is firmly attached.

As you look to optimise the location of your lux sensor, remember the inverse-square law which states that the "intensity" of a specified physical quantity (in this case photons) is inversely proportional to the square of the distance from the source (LEDs). Moving the sensor twice the distance further way will mean that the light will be one fourth the power. Moving it half as close will double the light intensity. What will be the ideal lighting plan during your experiment?

DISCUSSION AND FURTHER RESEARCH
The Phenobottle measures optical density using 875 nm LEDs and a chlorophyll ɑ fluorometer to measure the quantum yield of photosystem II through variable fluorescence (Fv).

What other ways might we consider besides measurement using light?